SQL Server is a robust and widely-used relational database management system (RDBMS) that enables organizations to store, retrieve, and manage vast amounts of data effectively. It is developed by Microsoft and provides a reliable and scalable solution for both small business and a large enterprise.
Before diving into the installation process, it’s essential to understand the significance of SQL Server in the world of data management. SQL Server offers a comprehensive set of features, including data storage, query optimization, security mechanisms, high availability, and business intelligence capabilities. It supports multiple data types, provides robust transactional support, and offers seamless integration with other Microsoft products and technologies.
In the following sections, we will guide you step-by-step on installing SQL Server as a standalone instance.
SQL Server Installation Process
Step 1: Launch the Setup File
To begin the installation, locate the setup file for SQL Server and run it. This file is typically provided by Microsoft and is commonly named “setup.exe” or “setup.msi”.
Step 2: Access the Installation Menu
After running the setup file, the SQL Server Installation Center will appear. Click on the “Installation” option in the left-hand menu to access the installation menu.
Step 3: Select Standalone Installation
Within the installation menu, choose the “New SQL Server stand-alone installation or add features to an existing installation” option.
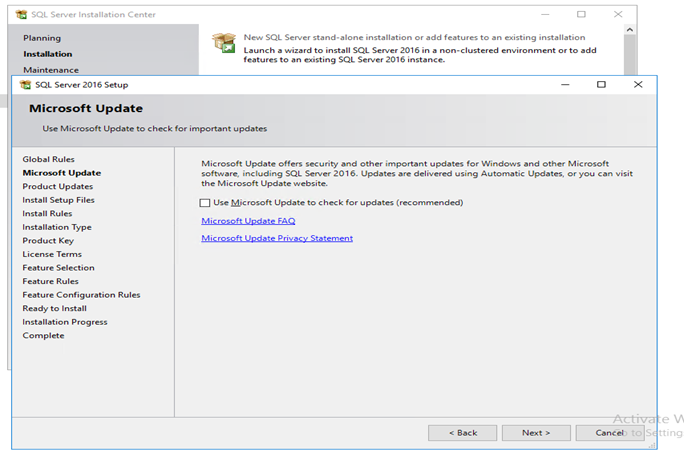
Step 4: SQL Server Installation Wizard
The SQL Server Installation Wizard will initiate and guide you through the installation process. It performs a system configuration check to ensure your machine meets the prerequisites for installation.
Step 5: Accept the License Terms Review
The license terms and accept them to proceed with the installation.
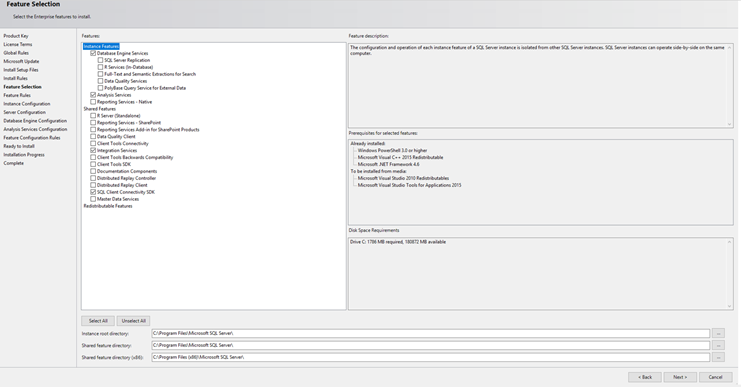
Step 7: Select Installation Features Choose the installation features you wish to include. For a standalone installation, ensure that the “Database Engine Services” feature is selected. You can also add other features based on your requirements.
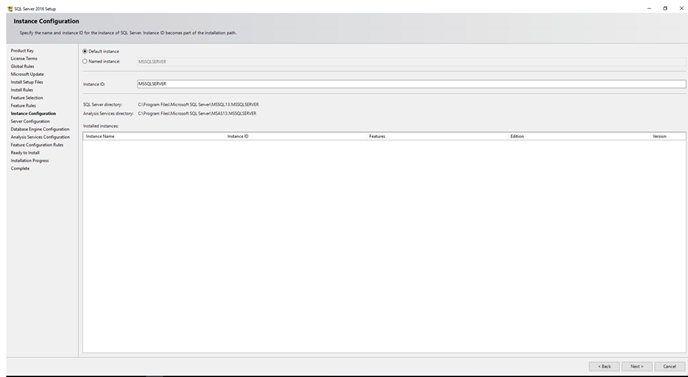
Step 8: Specify the Instance Name
Specify a name for your SQL Server instance. The default option is typically a named instance, but you can also opt for a default instance if desired.
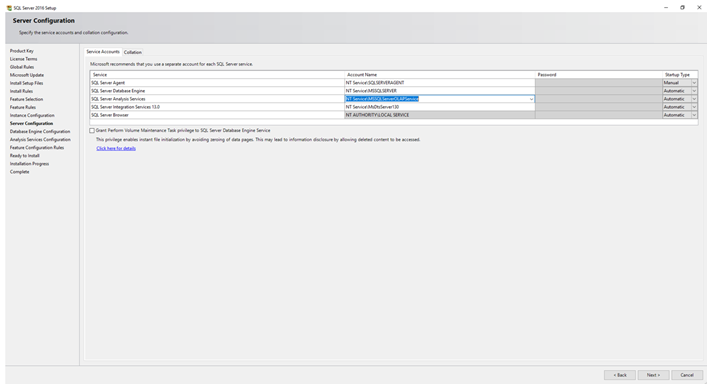
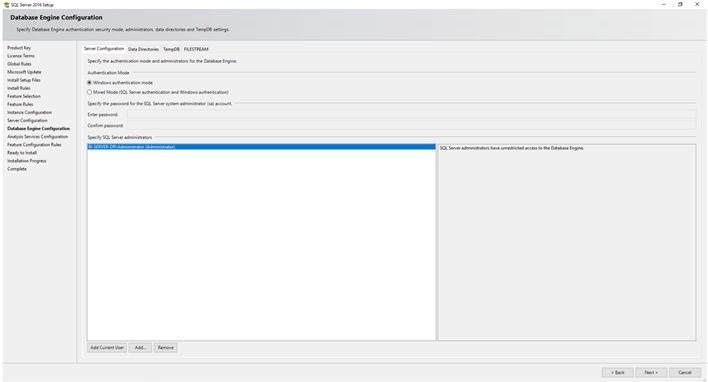
Step 9: Configure Server and Authentication
Configure the server settings by selecting the authentication mode (Windows Authentication or Mixed Mode). Add SQL Server administrators who will have administrative privileges.
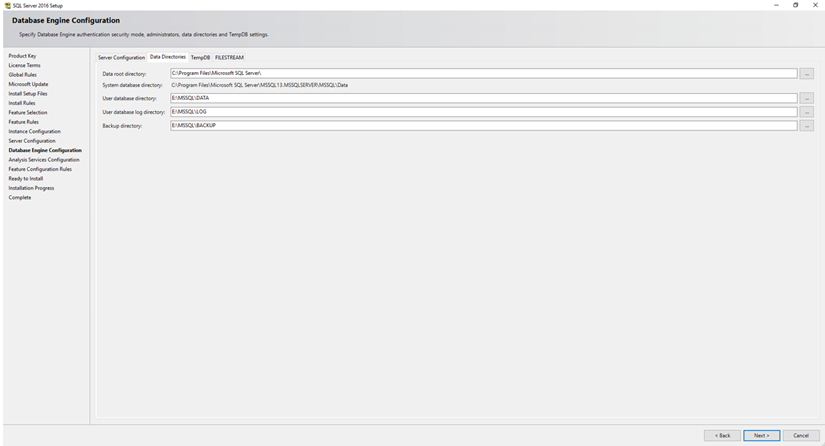
Step 10: Installation Location Choose the installation location for SQL Server files or use the default path.
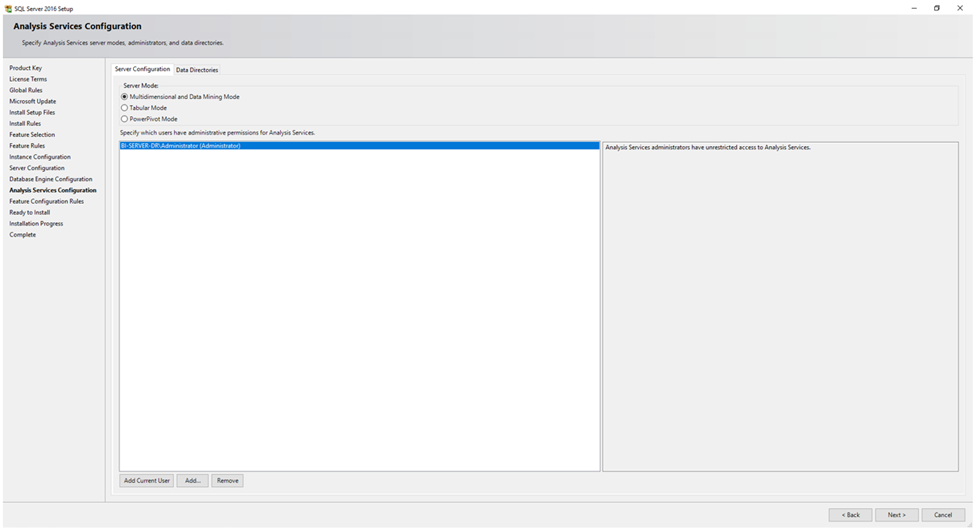
Step 11: Analysis Services Configuration
Configure the server settings by selecting the server mode (Multidimensional and data mining mode, Tabular Mode) and data directories and add the
Authentication mode (Windows Authentication or Mixed Mode). Add SQL Server administrators who will have administrative privileges.
Step 12: Review and Install Review the summary of your selections, ensuring they align with your requirements. Click on “Install” to initiate the installation process.
Step 14: Installation Completion
Once the installation is finished, a completion page will appear. Review the information provided and click on “Next” to proceed.
Step 15: Finalize and Exit
Click on “Close” to exit the SQL Server Installation Wizard.
You have successfully completed the installation process for SQL Server as a standalone instance with analysis services. The installation process may vary slightly depending on the version and edition of SQL Server you are installing. However, this guide should provide a solid foundation to get you started on your SQL Server journey.